Want to have the following information at your fingertips? Download and print the
Cisco AnyConnect: On a DCRI Windows Laptop quick reference card (QRC). This section applies only to the few DCRI employees/contractors who have either (or both):
- Access to a Windows Virtual Machine (VM).
- A second DCRI-owned computer at your desk currently running in a DCRI facility.
You can use Cisco AnyConnect to access the Desktop of either device. For this feature to work, the following must be in place. - To access a VM, you must have its address available (you will use it in Step 2).
- To access a DCRI-issued Windows computer at your desk at work, you must:
- Have available the DCRI computer's name (the number that begins with "DCRI-" on the asset tag). You need this name in Step 2.
- Have the DCRI-issued computer powered on and connected to the wired network, with you logged off. External monitors, if used, can be powered off.
- On the laptop, search and open the Remote Desktop Connection application.
The initial dialog appears.
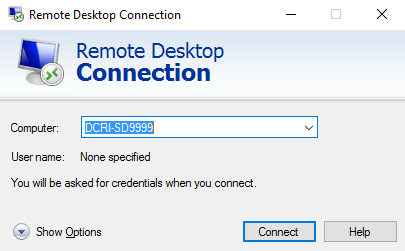 - In the Computer field, enter the DCRI Computer name or VM’s address.
- Click Connect.
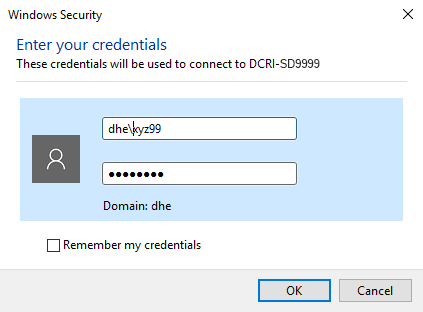
The Windows Security: Enter your
Credentials dialog appears.
- In the top box, enter dhe\, followed by your Duke NetID (e.g., dhe\xyz99).
- In the bottom box, enter your network password, and then click OK.
Note: For security, do not select Remember my credentials.
A bar shows the progress of connecting.
- If the Remote Desktop Connection certificate message appears, complete the following.
- (optional) You can select the Don’t ask me again for connections to this computer checkbox near the bottom.
- Click Yes.
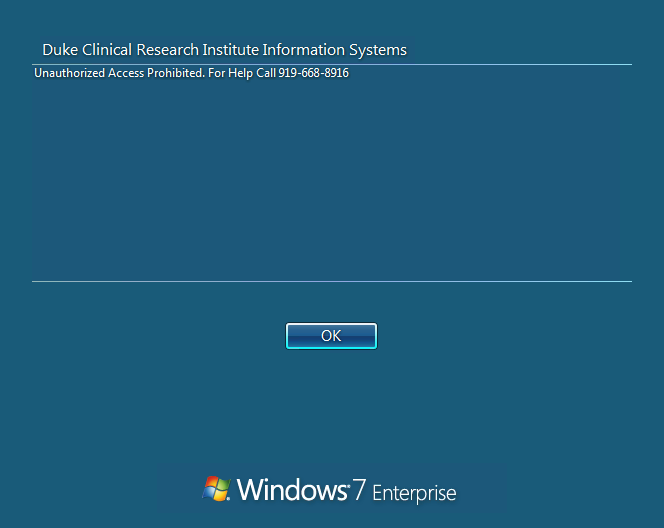
- When the blue DCRI Information Systems screen appears, click the OK button near the center.
A full-screen version of your work computer’s Windows Desktop appears.
At the top of the window is a blue toolbar.Use your local keyboard and mouse as if you were seated in front of your computer at work, including browsing to folders on network drives (that you have permission to access).
- To reduce the page size (so you can cut and paste files to or from your
local computer), click  on the blue toolbar. on the blue toolbar.
Note: To return to full screen, double-click anywhere in the window’s title bar (across the top). - To minimize, click
 on the blue toolbar. on the blue toolbar.The window minimizes while the icon on the right appears in the Taskbar. (Click this icon to maximize the window.) - To end the session, click
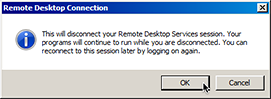
 on the blue toolbar. on the blue toolbar.
A confirmation message appears. - Click OK.
Both the window to the remote computer and the Remote Desktop Connection application close.
| |   

|
|
