|
After you connect to iDCRI, you can complete the following.
Jump menu: Opening an application | Navigating into and out of a folder | Closing an application | Accessing the DCRI Intranet |
 Accessing DCRI network drives | Accessing the Desktop of your DCRI-issued Windows computer at work | Accessing DCRI network drives | Accessing the Desktop of your DCRI-issued Windows computer at work |
Reading Tips | Searching for specific applications | Changing the view in iDCRI | Changing your password
| TASK | STEPS |
|---|
| Opening an application |
The application and folder icons on the main page are hyperlinks that require a single click. The list of applications you see here may differ from the screen shot below, based on your functional group affiliation and job role. 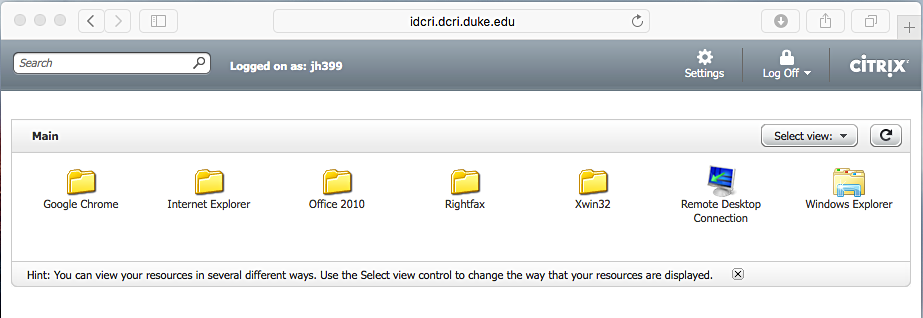
A few of the more common applications include:
- Google Chrome: The preferred browser to open the Clinical Trial Management System (CTMS) web app.
- Windows Internet Explorer: Needed for web applications that require this browser—such as InForm and for owners on SharePoint site collections. Also available in this folder:
- Office 365-Outlook: The web-based version of the Duke/DCRI email system.
- EPM Time Card: The time card version of Enterprise Project Management (EPM) for employee time tracking.
- Microsoft Office 2010 (in the Office 2010 folder): Windows versions of Access, Excel, OneNote, PowerPoint, and Word.
- RightFax: Desktop faxing software.
- Remote Desktop Connection: A way for DCRI employees/contractors that have a DCRI-issued Windows computer at their desk at a DCRI facility to access its Desktop from an OS X computer.
- Windows Explorer: Portal to DCRI shared network drives (permission required).
 After you click an application icon, a message appears (see right), alerting you that an application is starting up. (With a few applications, a Citrix Metaframe message appears, to update you on the progress of opening the application.) After you click an application icon, a message appears (see right), alerting you that an application is starting up. (With a few applications, a Citrix Metaframe message appears, to update you on the progress of opening the application.)
Please be patient. Depending on a number of factors, it may take a while for Citrix to open a separate window so you can use a Windows version of the application you selected. | Also, there is now a Viewer icon for this application in the Dock. If you open
multiple applications, most of them will be represented by this icon. However, a few
applications (such as Windows Explorer) might create their own separate Viewer icon. | |  |
|
|
Navigating into and out of a
folder |
 To open a folder, click the folder icon or its name once. To return to the main page, do not use the browser's Back button. Instead, click Main in the breadcrumb (except in Tree view, see Changing the view in iDCRI). |
| Closing an application
|
- Save your work.
Warning: If you have multiple applications open, all (or some of them) will close at the same time. Save your work in all applications. 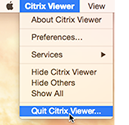 Click anywhere inside an application's window (not the iDCRI window). Click anywhere inside an application's window (not the iDCRI window).
The menu bar shows Citrix Viewer. - Click Citrix Viewer.
A drop-down menu appears.
- Select Quit Citrix Viewer.
A dialog window appears.
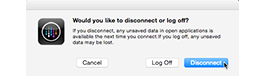 Click either Log Off or Disconnect. (If you did not save your work in Step 1, click Disconnect.) Click either Log Off or Disconnect. (If you did not save your work in Step 1, click Disconnect.)
One or more applications close and the corresponding Viewer icon on the Dock disappears. |
| Opening Internet Explorer to access the DCRI Intranet |
- Click the Internet Explorer folder.
- Click the latest version of Internet Explorer available.
The DCRI Intranet home page opens by default. You can now access Intranet pages, resources, and internal web applications.
|
| Accessing DCRI network drives |
Although you can go to network drives and folders (that you have permission to access), editing files in iDCRI itself is limited: you can only use Windows-based applications available in iDCRI for the editing. For example, editing a text file will be done in Notepad and not TextEdit. To edit a file using a non-iDCRI application, you must copy the file to your local drive to open, edit, and save the file, and then upload it back to the network drive.
Tip: If you need to access and work on a number of files stored on shared network drives, use Cisco AnyConnect instead.
 Click Windows Explorer. Click Windows Explorer.
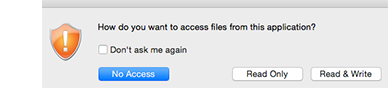
A confirmation message opens (see right), prompting you to determine your level of access to the drive.
Note: Although you can click the Don't ask me again checkbox so you do not see the message again, we recommend you leave this checkbox cleared (the default setting).
- Click either Read Only (rare) or Read & Write (typical).
A Windows Explorer window opens, containing DCRI network drives and drives on your computer. 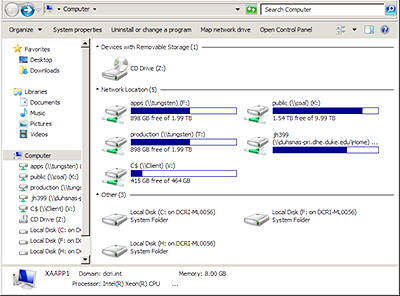
- Click the drive you want.
- Explore the contents of the drive (that you have permission to access).
Note: The C$ drive is your local computer's own hard drive.
|
| Accessing the Desktop of your DCRI-issued Windows computer powered on at your desk at the DCRI |
If you are a DCRI employee or contractor and have a DCRI-issued Windows desktop currently running at your desk at work, you can access its Desktop from OS X using Remote Desktop Connection. To access the Windows machine using iDCRI/Citrix, there are a number of prerequisites. You must:
- Have available the computer name (the number that starts with "DCRI-" on the DCRI asset tag).
- At work, leave the Windows machine powered on and connected to the wired network, with you logged off. External monitors can be powered off.
- Have the Remote Desktop Connection application available in iDCRI.
- Click Remote Desktop Connection
The Remote Desktop Connection dialog opens. 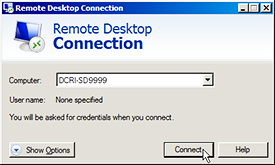
-
Enter the name for the DCRI computer (from the asset tag), and then click Connect.
The Windows Security dialog opens.
- Enter your network password, and then click OK.
If a Remote Desktop Connection warning message appears, advising you that the security certificate cannot be authenticated, this is not a error condition. Click Yes.
 A new full-size window appears with a toolbar (like the one shown to the right) at the top center. To proceed to the Desktop, click  in the window. in the window. You are now accessing the Desktop of the DCRI computer as if you were seated at your desk at work. - To end the Remote Desktop Connection:
- Click the close button
 at the right-hand edge of the toolbar at the top of the window. at the right-hand edge of the toolbar at the top of the window.
A confirmation message appears. - Click OK.
|
| Reading Tips |
 Across the bottom of the Applications box is a hint on how to use iDCRI. To read a different tip, click the Refresh button. Across the bottom of the Applications box is a hint on how to use iDCRI. To read a different tip, click the Refresh button. |
| Searching for specific applications |
Useful if you have many applications (rare), you can use the Search box in the upper left to find resources in iDCRI (only).
- Enter one or more words in the Search box.
- Either press Enter or click the magnifying glass icon.
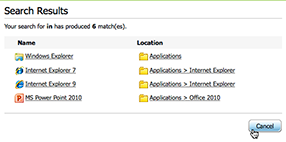 Results appear in the middle of the window, replacing the Applications/Content tabs. Results appear in the middle of the window, replacing the Applications/Content tabs.
- Do one of the following:
- Click any hyperlink under Name or Location.
- If you don’t see what you want, enter more precise information into the Search box, and then press Enter.
- To close Search Results, click Cancel.
|
| Changing the view in iDCRI |
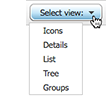 The default view of the applications is by Icons. To change this, click the Select view drop-down arrow to select Details, List, Tree, or Groups. The default view of the applications is by Icons. To change this, click the Select view drop-down arrow to select Details, List, Tree, or Groups. |
|
