|
For this feature to work, you must: - Have Remote Desktop Connection available in iDCRI.
- Have available the computer's name (the number on the DCRI asset tag that begins with "DCRI-").
- Leave the DCRI computer at work powered on and connected to the wired network, with you logged off. (External monitors can be powered off.)
| TASK | STEPS |
|---|
| Start a session |
 Click Remote Desktop Connection. Click Remote Desktop Connection.
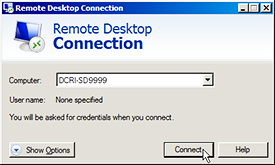
The Remote Desktop Connection dialog opens. - Enter the Computer name for the DCRI Windows computer (from the DCRI asset tag), and
then click Connect.The Windows Security dialog opens.
 - Enter your network password, and then click OK.
- If a Remote Desktop Connection warning message appears, advising you that the security certificate cannot be authenticated, this is not an error condition. Click Yes.
 A new full-size window appears with a toolbar (like the one below) at the window's top center. 
- To proceed to the Desktop, click
 in the middle of the window. in the middle of the window.You are now accessing the Desktop of the DCRI computer as if you were seated at your desk at work. Note: with iDCRI, you can neither copy-and-paste nor drag-and-drop files or folders between the remote Desktop window and your local computer. To do this, use Cisco AnyConnect.
|
| End a session |
- Click the Close button
 at the right-hand edge of the toolbar at the top of the remote window. at the right-hand edge of the toolbar at the top of the remote window.A confirmation message appears.
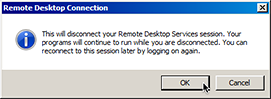 - Click OK.
The Remote Desktop Connection application closes.
|
|