|
After you connect to iDCRI, you can complete the following.
Jump menu: Opening an application | Navigating into and out of a folder | Changing your network password |
 Accessing the DCRI Intranet (with Internet Explorer) | Accessing the Desktop of your DCRI-issued computer | Accessing the DCRI Intranet (with Internet Explorer) | Accessing the Desktop of your DCRI-issued computer |
Accessing network drives (with Windows Explorer) | Printing in iDCRI | Reading tips |
Searching for specific applications | Changing the view |
| TASK | STEPS |
|---|
| Opening an application |
The application and folder icons on the main page are hyperlinks that require a single click. The list of applications you see here might differ from the screen shot below, based on your functional group affiliation and job role.
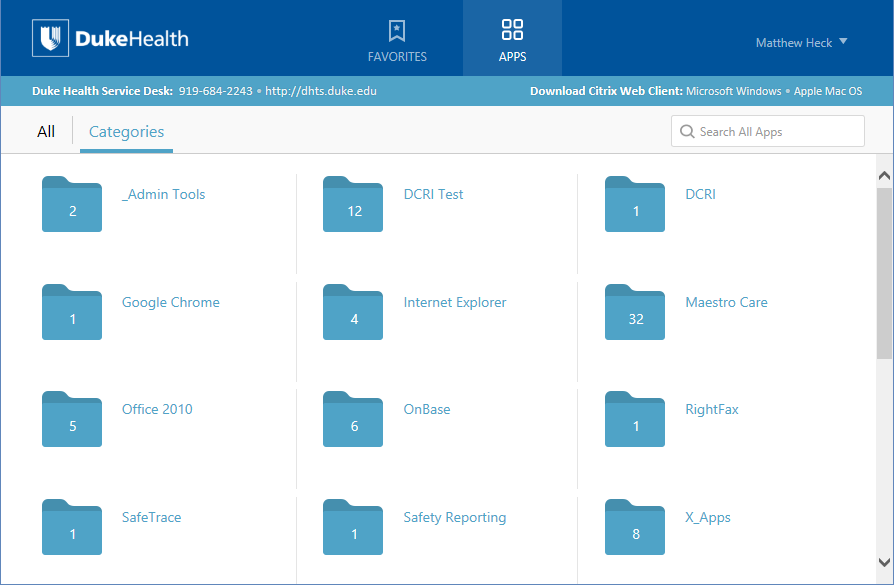
A few of the more common applications include:
- Windows Internet Explorer 7 and 9 (in the Internet Explorer folder): Needed for access to the DCRI Intranet and to web applications that require this browser—such as InForm and for owners on SharePoint site collections.
- Office 365-Outlook (in the Internet Explorer folder): The web-based version of the Duke/DCRI email system.
- EPM Time Card (in the Internet Explorer folder): The time card version of Enterprise Project Management (EPM) for employee time tracking.
- Microsoft Office 2010 (in the Office 2010 folder): Full versions of Access, Excel, OneNote, PowerPoint, and Word.
- RightFax: Desktop faxing software.
- Remote Desktop Connection: Remote access application that enables you to see and operate from your remote computer the Desktop of your DCRI-issued Windows computer at work.
|
After you click an application icon, the application opens in a new window. Depending on a number of factors, an application might require multiple clicks to launch.
With internet Explorer on Windows 8.1, a message box appears across the bottom of the page. To proceed, click Open.

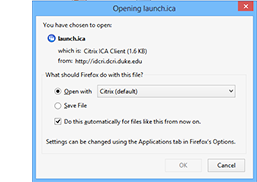 With Firefox, you are prompted to verify that you want launch.ica to run. Click the Do this automatically for files like this from now on checkbox, and then click OK. You will not see this dialog again until there is an upgrade to iDCRI/Citrix software. With Firefox, you are prompted to verify that you want launch.ica to run. Click the Do this automatically for files like this from now on checkbox, and then click OK. You will not see this dialog again until there is an upgrade to iDCRI/Citrix software.
|
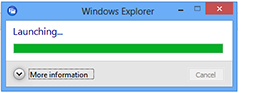 With some applications, a dialog with a progress bar appears, showing the progress of opening the application. WIth a few applications, the progress bar dialog has the title of Citrix MetaFrame. With some applications, a dialog with a progress bar appears, showing the progress of opening the application. WIth a few applications, the progress bar dialog has the title of Citrix MetaFrame.
|
With applications that enable you to update information, one or two Citrix plug-in dialogs appear:
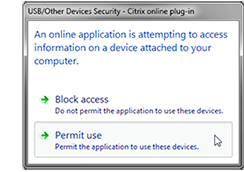
- One plug-in dialog has you verify that you want the application to remotely access a server. Ordinarily, you click Permit use.
- A different plug-in dialog has you grant permission for the application to update your computer's hard drive. Ordinarily, you click Permit all access.
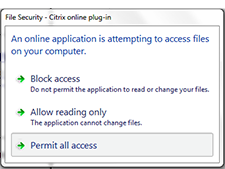
Important! It is possible for a plug-in dialog to be located behind other windows. If an application window appears to be frozen, it can be that the system is waiting for you to click in a plug-in dialog that is currently hidden from your view. | |
|
Navigating into and out of a
folder |
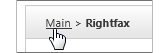 To open a folder, click the folder icon or its name once. To return to the main page, do not use the browser's Back button. Instead, click Main in the breadcrumb (except in Tree view, see Changing the view). |
| Changing your network password |

- On the gray menu bar at the top of the window,
click Settings.
The Settings page appears. 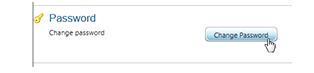 In the Password section, click Change Password. In the Password section, click Change Password.
The Change Password screen opens. 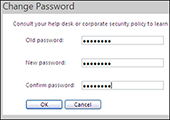 - In the Old password field, enter your current password.
- Enter a new password into both the New password and (to verify
you typed it correctly) Confirm password fields.
Passwords must be eight or more characters in length (no spaces) and contain at least three of the following four types of characters: - Two or more upper case letters
- Two or more lower case letters.
- One or more numbers.
- One or more symbols (except the ampersand: &).
Do not use:
- Recognizable words (forward or backward).
- Sequences (such as abcde...).
- Character substitutions (such as $ for the letter 's').
- All or part of your NetID or personal name.
- Click OK.
The Change Password screen closes.  To close the Settings page, click Save in the upper right corner. To close the Settings page, click Save in the upper right corner. |
| Opening Internet Explorer to access the DCRI Intranet |
- Click the Internet Explorer folder.
- Click the latest version of Internet Explorer available.
The DCRI Intranet home page opens by default. From here you can navigate to a web page or internal web app you need. |
Accessing DCRI network drives
(with Windows Explorer) |
You can use iDCRI to go to network drives and folders you have permission to access. There are two ways to access DCRI network drives:
- Remotely accessing the Desktop of a DCRI-issued computer currently running in a DCRI facility and reaching network drives from the standpoint of your work computer. This is the preferred method, as you will have full editing capabiilties.
- Using the Windows Explorer application, discussed below (if the application is available in iDCRI for you). Although this is a quicker way to reach files in the network, you have severely limited editing capabilities: while you are in iDCRI you can only use applications available in iDCRI for the editing. For example, since there is not an application available in iDCRI for video editing, you cannot work on video files in iDCRI/Citrix by using Windows Explorer. To edit a file using a non-iDCRI application, you must copy the file to your local drive to to open, edit, and save the file, and then upload it back to the network drive.
- Click Windows Explorer.
A Windows Explorer window opens, displaying DCRI network drives. 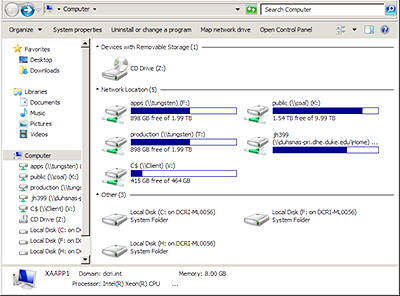
- Click the drive you want. (The C$ drive is your local computer's own hard drive.)
- Explore the contents of the drive (that you have permission to access). if you are denied access to a server or folder you require for work, contact the DCRI Service Desk.
|
| Accessing the Desktop of a DCRI-issued computer |
If you are a DCRI employee or contractor and have a DCRI-issued Windows computer at your desk in a DCRI facility, you can access the Desktop of the DCRI computer remotely. For details, see Accessing the Desktop of your DCRI Computer. |
| Printing in iDCRI |
You can send print jobs from your local computer only to the printers appearing in your Devices and Printers control panel. You cannot use iDCRI to add a DCRI network printer to your local computer. Exception: If you access the Desktop of a DCRI-issued Windows computer with the Remote Desktop Connection application, you have access in that window to DCRI network printers. |
| Reading Tips |
 Across the bottom of the Applications box is a hint on how to use iDCRI. To read a different tip, click the Refresh button. Across the bottom of the Applications box is a hint on how to use iDCRI. To read a different tip, click the Refresh button. |
Searching
for specific applications |
Useful if you have many applications (rare), you can use the Search box in the upper left to find resources in iDCRI (only).
- Enter one or more words in the Search box.
- Either press Enter or click the magnifying glass icon.
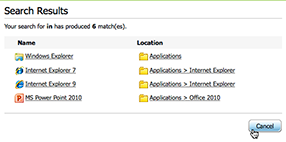 Results appear in the middle of the window, replacing the Applications/Content tabs. Results appear in the middle of the window, replacing the Applications/Content tabs.
- Do one of the following:
- Click any hyperlink under Name or Location.
- If you don’t see what you want, enter more precise information into the Search box, and then press Enter.
- To close Search Results, click Cancel.
- If you do not see what you wanted, enter more precise information into the Search box, and then press Enter.
- To close Search Results, click Cancel.
|
| Changing the view |
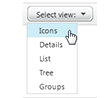 The default view of the applications uses folders and Icons. To change this, click the Select view drop-down arrow to select Details, List, Tree, or Groups. The default view of the applications uses folders and Icons. To change this, click the Select view drop-down arrow to select Details, List, Tree, or Groups. |
|
