|
The first time you access the iDCRI website, install the Citrix Receiver software on your computer.
Important! El Capitan (OS X 10.11) generates error messages you can ignore. The web app will still operate.
| TASK | STEPS |
|---|
| Installing the Citrix Receiver |
- Open your browser to connect.dcri.org.
The DCRIconnect portal page opens.
- On the list of applications, click CITRIX IDCRI.
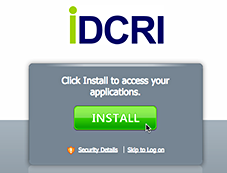
The iDCRI software install page appears.
- Click Install.
Wait for the CitrixReceiver.dmg file to finish loading into your Downloads folder.
- In your Downloads folder, double-click the CitrixReceiver.dmg disk image file.
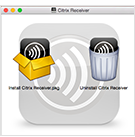
The Citrix Receiver dialog opens.
- On the left, click the Install Citrix Receiver.pkg icon.
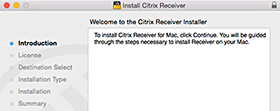
In a new dialog window, the Introduction screen opens (see right).
- Click Continue.
The License screen opens. The full license information is in two sentences at the top.
- Click Continue.
A drop-down dialog appears (see right). - Click Agree.
The drop-down dialog rolls up and the Installation Type page appears. - Click Install.
- If a message appears prompting you for the administrator's username and password, enter that information, and then click Install Software.
- With El Capitan, when a warning message appears (informing you that the package is incompatible), click the Install Anyway button.
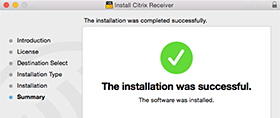
The Installation page appears with a progress bar and messages. Wait for the Summary screen to appear. With Yosemite, a success message appears (see right). With El Capitan, you can ignore the messsage about the installation failing.
- Click Close.
- Close the Citrix Receiver dialog window (that opened in Step 4).
- If a confirmation message appears (see right), prompting you to verify that you want the
Citrix Receiver to be used on this website,
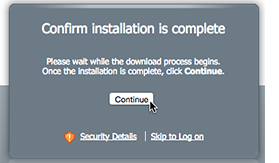
click Trust. - With Yosemite, click the Continue button on the Confirm Intallation is Complete screen.
The iDCRI Welcome page is the remaining screen.
- Proceed to Logging on to iDCRI/Citrix.
|
| 


 |
|
|